How to start a DXRP server on s&box
Learn how to create your first DXRP server on s&box.
So, s&box has just released, and you're looking to create your very own DXRP server.
Good news: getting started is nice and straightforward. This guide will walk you through creating your DXRP community, configuring your server inside the DXRP portal, and linking everything to your PLAYERTICK s&box server.
By the end, your server should be authorised, configured, and ready for players to join.
Prerequisites
Before you start, make sure you have:
- A s&box server. You can view our plans here.
- A Steam account.
- Access to the DXRP portal.
- A little patience.
You do not need to manually edit lots of server files for this setup. Most of the important DXRP configuration is handled through the DXRP portal, and PLAYERTICK takes care of the server-side setup once you provide your DXRP server token.
Step 1 - Create your community on the DXRP portal
First, you need to create your DXRP community. This is where your server settings, rules, ranks, and configuration will live.
- Visit dxrp.net and click "Sign in through Steam":

- Once you are logged in, you will see a screen that looks like this:
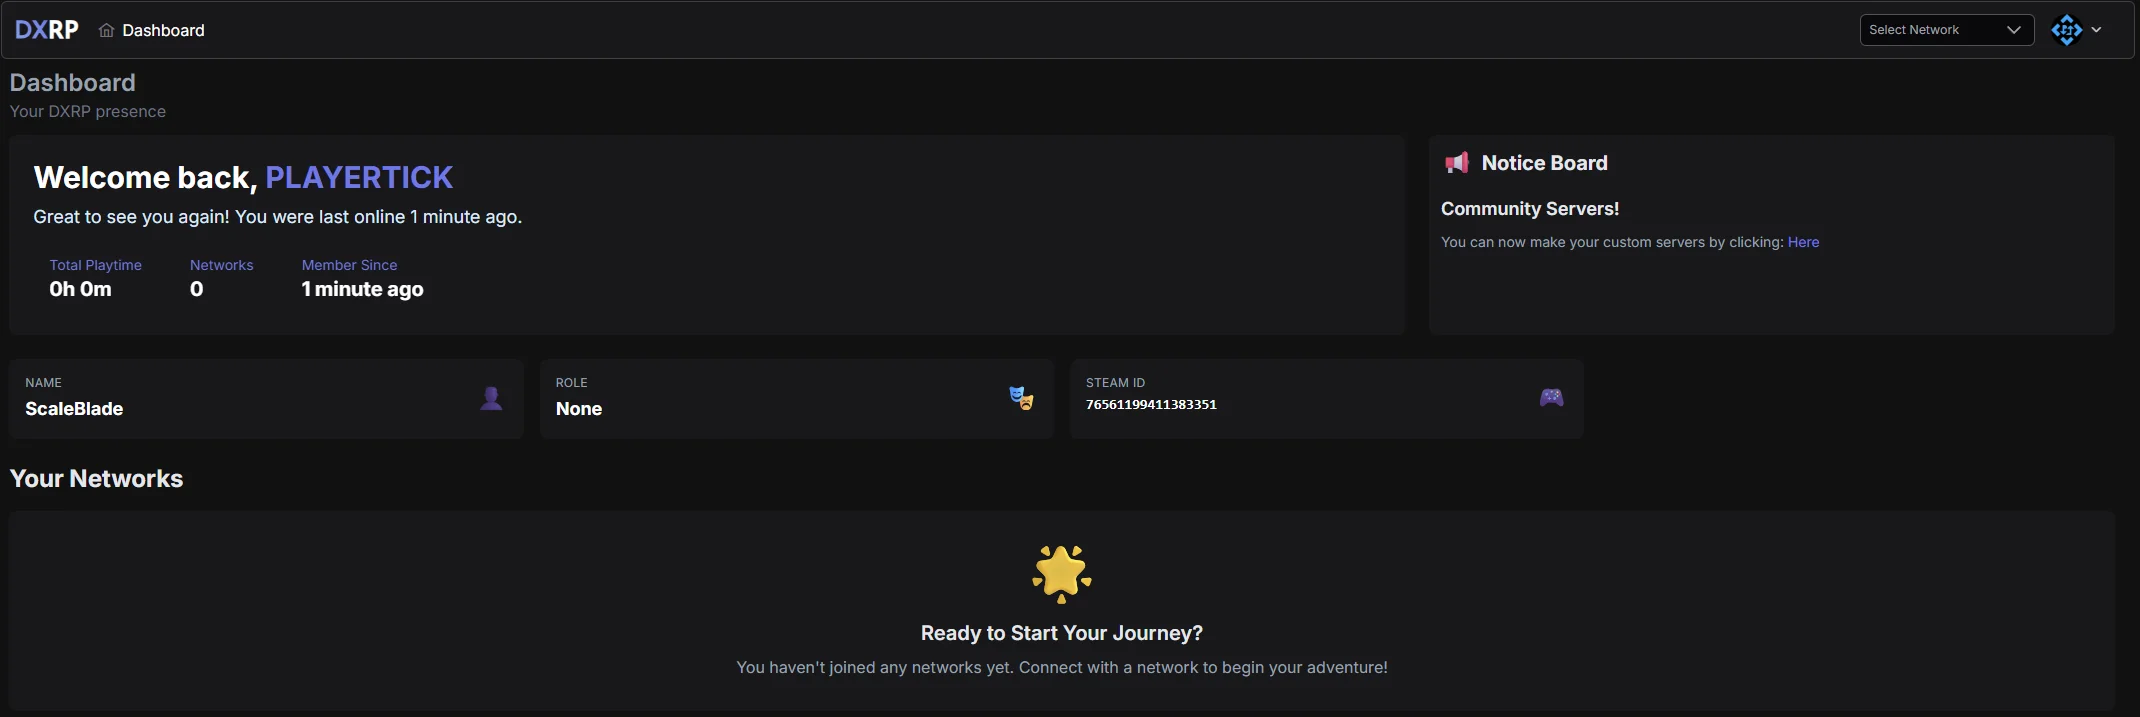
- Under the notice board, you will see a message that says, "You can now make your custom servers by clicking: Here". Click this link and complete the onboarding process.
The onboarding process creates your community inside DXRP. Once this is complete, you will be able to manage your community settings and create servers from the portal.
- Once your community has been created, you will be taken to your community dashboard. This is where you can configure all of your DXRP settings.

- Before creating your server, it is worth configuring some of the important community information, such as your rules and staff ranks.
These settings help define how your server will run. You do not need to perfect everything immediately, but setting up the basics now will make the server configuration smoother later.
- Once you are ready, click Servers and add a new server.
The server name you enter here will be shown in the s&box server list, so choose something clear and recognisable. Try not to make it too short, too long, or too vague. A good server name helps players understand what they are joining.
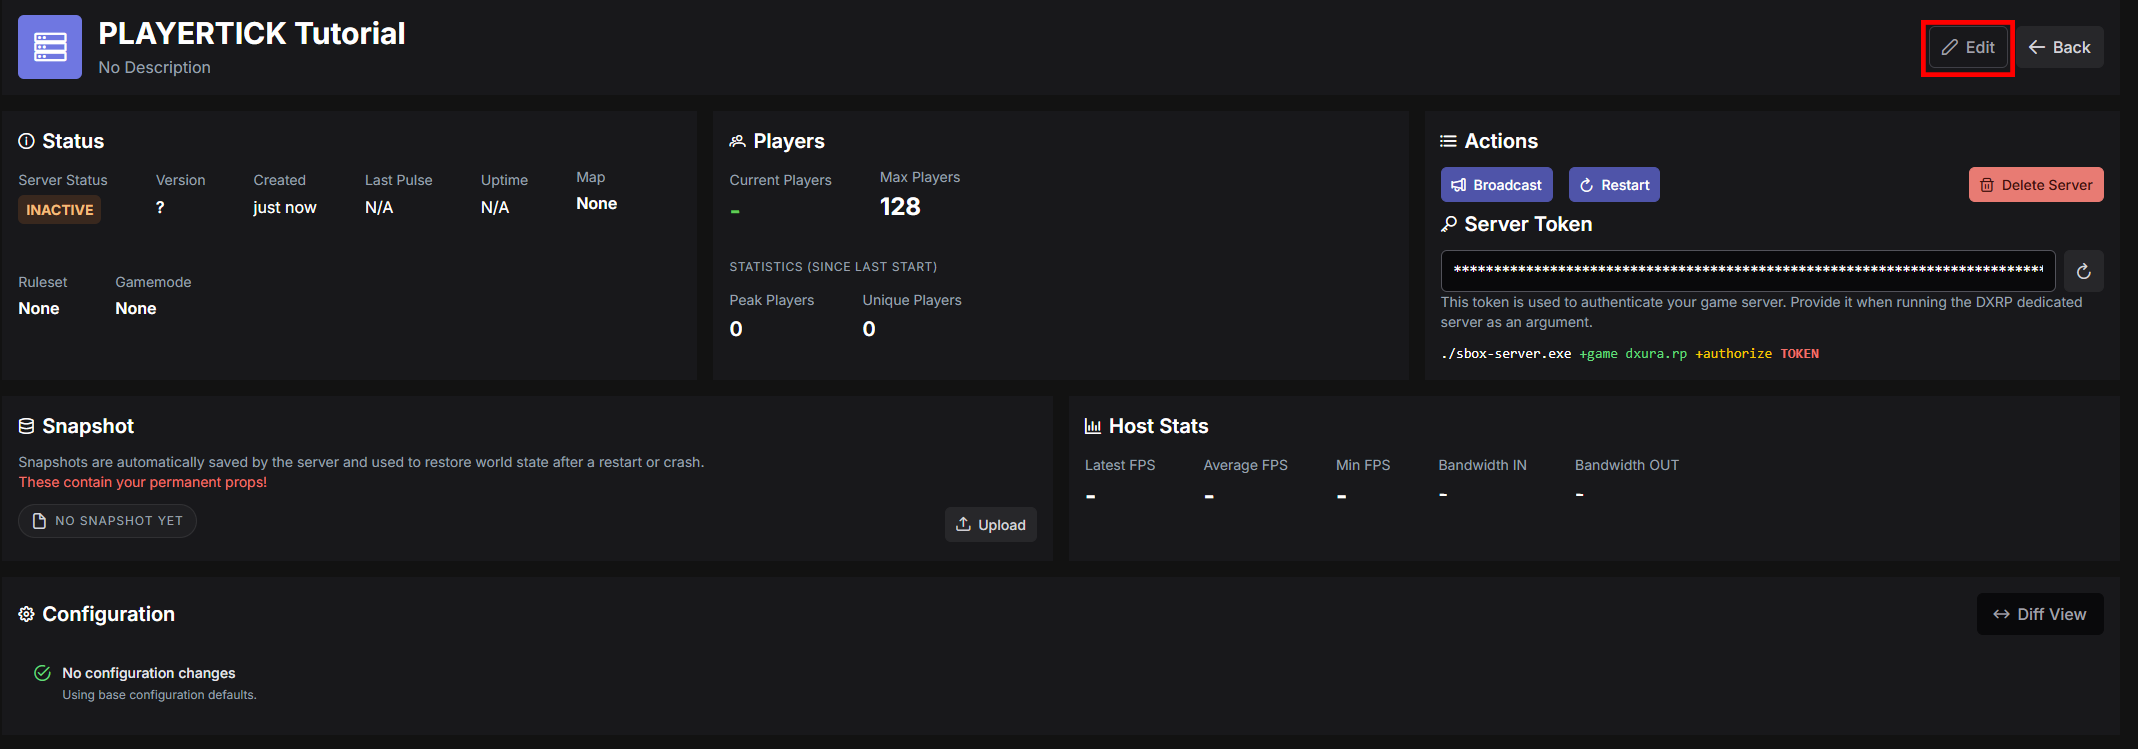
- Once the server has been created, you will see a page that looks something like this. Click the edit button.
- Enter your desired map, select the ruleset you created earlier, and choose the "Vanilla" gamemode. You can also set your maximum player count here.
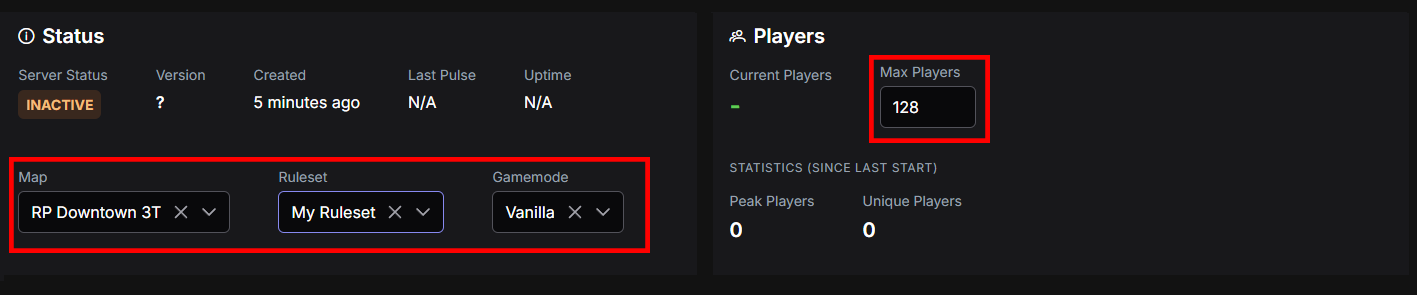
At this stage, double-check the map, ruleset, gamemode, and player count before saving. These settings control how your server appears and behaves once players start connecting.
-
Once everything looks correct, click "Save" in the top right. Your basic DXRP server configuration is now done.
-
The final step in the DXRP portal is to regenerate and copy your server token.
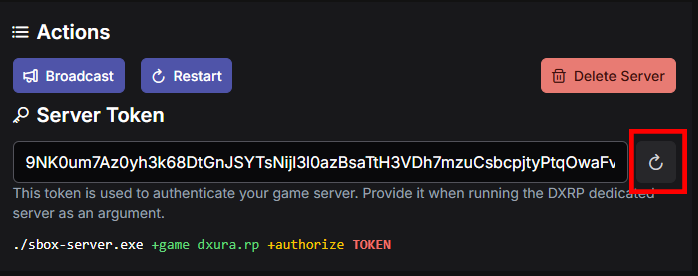
Make a note of this token somewhere safe, as you will need it in the next step. You will not be able to view it again after leaving the page, so copy it before continuing.
Step 2 - Configure your s&box server on PLAYERTICK
Now that your DXRP server has been created, the next step is to link it to your PLAYERTICK s&box server.
On PLAYERTICK, this could not be easier.
Head over to your client area and click "Manage" on your s&box server. You will see a page like this:
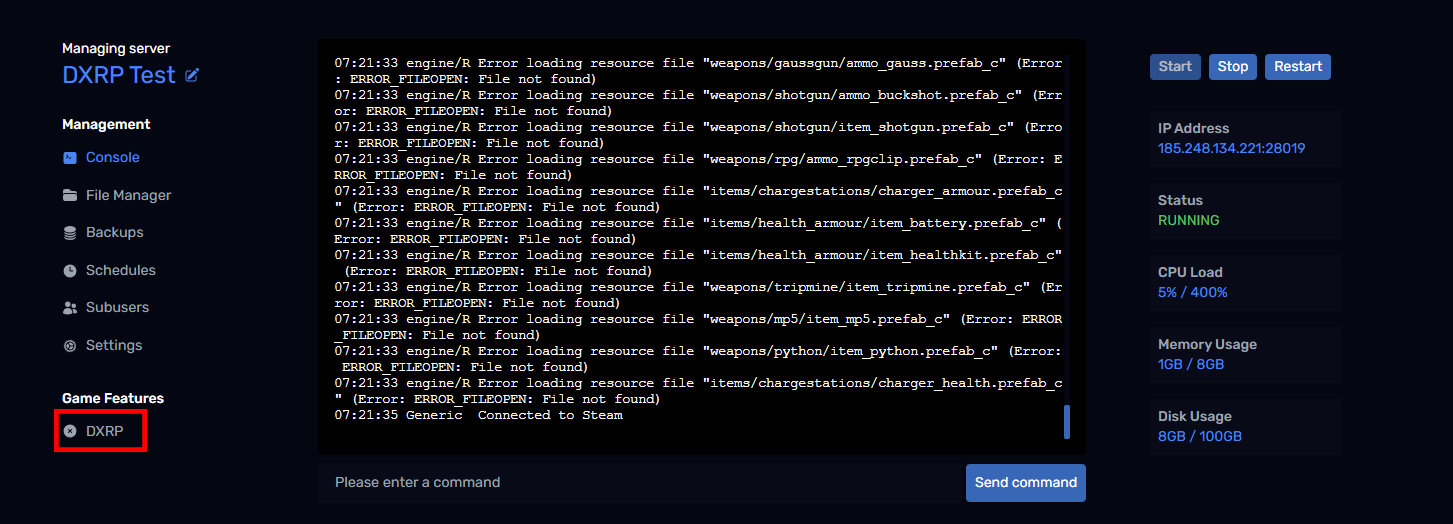
Click the "DXRP" button and enter the DXRP server token you copied earlier:
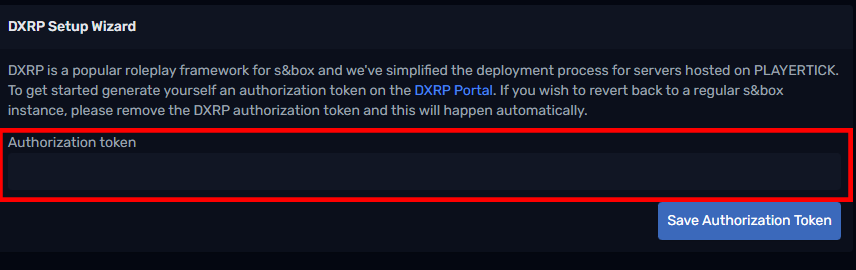
Once you click "Save Authorization Token", your s&box server will reinstall.
This reinstall reconfigures your s&box server so that it meets the requirements for DXRP. You do not need to manually change the startup command or upload any additional files yourself.
While the reinstall is running, leave the server to complete the process. Once it has finished, your server should be ready to communicate with DXRP.
Step 3 - Check your DXRP server status
When the reinstall is complete, head back over to the DXRP Portal and check your server.
The server status should now show as active. Once it is active, clients should be able to connect through the s&box server list.
If everything has worked correctly, your DXRP server is now linked to your PLAYERTICK s&box server.
Step 4 - Review the advanced configuration
After your server is active, you can click edit again inside the DXRP portal to access more configuration options.
At the bottom of the edit page, you will find a JSON editor. This contains the advanced configuration options available to DXRP server owners.
You do not need to change these settings immediately, but they are useful once you want to customise your server further. Before making larger changes, it is a good idea to change one option at a time and then test the server afterwards.
Troubleshooting
If your server does not show as active straight away, check the following:
The token was copied incorrectly
Make sure the full DXRP server token was copied into the PLAYERTICK panel. Missing characters, extra spaces, or an old token can prevent the server from authorising correctly.
The server is still reinstalling
After saving the authorization token, your s&box server needs to reinstall. Wait for the reinstall to finish before checking the DXRP portal again.
The wrong DXRP server was used
If you have created multiple servers in the DXRP portal, make sure you regenerated and copied the token from the correct server.
The DXRP configuration was not saved
After editing your DXRP server settings, make sure you clicked "Save" in the top right of the portal.
Players cannot see or join the server
If the DXRP portal shows the server as active but players cannot join, check that your server name, map, gamemode, and player count are configured correctly in the DXRP portal.
Next steps
Once your server is online, you can start shaping it into your own community.
A few good next steps are:
- Finalise your ruleset.
- Create your staff ranks.
- Review the advanced JSON configuration.
- Test the server with a small group of players.
- Make small configuration changes and test them one at a time.
That is it. Your DXRP server should now be configured and running on PLAYERTICK.